Why Choose us?

Low MOQ
Small MOQ is available and you can purchase different types in one batch

Fast Delivery
We’re so confident in our slippers that we offer a 7-15 day lead time on all orders.

Competitive Price
We always provide high-quality slippers at an affordable price.
OEM/ODM
We have a team of experts who can help you find the perfect solution for your needs.

Customer Service
We’ll get you the answers to all of your questions, quickly and effectively

Easy Communication
We think in your ways. Consider your requirements in priority and how to meet them.
100+ Knowledge You Need to Know About Cotton Slipper
Material Selection
1.EVA vs. TPR: Which Slipper Sole Material Fits Your Market Best?
If your target customers value softness, lightness, and indoor comfort — or if you’re running a small test batch to explore market feedback — EVA soles are your best choice.
If your customers often wear slippers outdoors, or you sell in regions with humid or rainy climates, TPR soles are the safer and longer-lasting option.
2.How Do Different Cotton Fabrics (e.g., Terry Cloth, Coral Fleece, Flannel) Affect the Durability and Lifespan of Slippers?
1. **Terry Cloth**
– **Characteristics**: Made with looped fibers, providing high absorbency and a soft, towel-like texture.
– **Durability**: Moderate durability; prone to snagging due to the loops, which can wear down over time with frequent washing.
– **Lifespan**: Typically has a shorter lifespan in high-wear areas, though its thickness offers a cozy feel for light, indoor use.
– **Best For**: Bath slippers or slippers used in low-traffic areas, where absorbency is prioritized over heavy durability.
2. **Coral Fleece**
– **Characteristics**: A synthetic microfiber fabric with a plush, velvet-like texture that is lightweight and soft.
– **Durability**: High durability; coral fleece resists pilling and can withstand frequent washing, as its fibers are less prone to wear than natural cotton.
– **Lifespan**: Generally longer-lasting than terry cloth, retaining softness and shape well over time.
– **Best For**: Slippers designed for regular use, where softness, warmth, and resilience are important; coral fleece is ideal for winter slippers.
3. **Flannel**
– **Characteristics**: A woven cotton fabric with a brushed surface, offering warmth, breathability, and moderate softness.
– **Durability**: Good durability; flannel is resistant to pilling and holds up well over time, though it can lose softness if washed improperly.
– **Lifespan**: Longer lifespan than terry cloth, making it suitable for moderate to regular use in slippers.
– **Best For**: Everyday indoor slippers, where comfort and moderate durability are key, especially for cooler seasons.
4. **Comparative Durability and Use Case Summary**
– **Terry Cloth**: Offers excellent absorbency but is prone to wear and snagging, ideal for bath slippers that won’t see heavy wear.
– **Coral Fleece**: Highly durable, resists pilling, and retains softness, making it suitable for regular, cozy indoor use and slippers for colder seasons.
– **Flannel**: Balances warmth and breathability with good durability, ideal for everyday use, though it may require careful washing to maintain its feel.
3.How Do Cotton Slippers Perform in Terms of Sweat Absorption?
1. **Natural Absorbency of Cotton**
– **Moisture-Wicking**: Cotton fibers are naturally absorbent and can hold up to 27 times their weight in moisture, making cotton slippers effective at wicking away sweat.
– **Breathability**: Cotton’s breathable structure promotes airflow, allowing moisture to evaporate rather than staying trapped.
– **Result**: Cotton slippers absorb sweat and release moisture, preventing excessive buildup and keeping feet more comfortable.
2. **Soft and Non-Irritating on Skin**
– **Gentle Texture**: Cotton is soft and hypoallergenic, reducing irritation from sweat and friction, making it comfortable to wear without causing skin issues.
– **Non-Slip Lining**: Cotton’s absorbent texture also helps prevent slipper interiors from becoming slick with moisture, improving stability.
– **Result**: The soft texture of cotton absorbs sweat without causing irritation, making slippers feel comfortable and non-slippery even when feet sweat.
3. **Keeping Feet Dry**
– **Evaporation Support**: While cotton absorbs moisture effectively, it also releases it gradually, helping to keep feet from feeling excessively wet or damp.
– **Limitations**: Cotton holds onto moisture longer than synthetic fibers, so in highly humid or active settings, it may feel damp if not allowed to air out.
– **Result**: Cotton slippers are good at keeping feet dry in low to moderate activity levels but may require regular drying if worn continuously in high-moisture environments.
4. **Terry Cotton for Enhanced Absorption**
– **High Absorbency**: Terry cotton, with its looped fibers, increases surface area for moisture absorption, making it ideal for situations where high absorbency is needed.
– **Quick Drying**: Although terry cotton absorbs a large amount of moisture, it allows for quick drying if slippers are aired out.
– **Result**: Terry cotton slippers are especially suitable for bath or humid settings, keeping feet dry and comfortable.
5. **Maintenance for Optimal Performance**
– **Regular Washing**: Cotton slippers should be washed regularly to remove accumulated moisture and bacteria, which can build up over time.
– **Proper Drying**: Letting slippers air out between uses helps maintain their absorbency and keeps them fresh.
– **Result**: With proper care, cotton slippers maintain their sweat-absorbing qualities, making them ideal for everyday wear.
4.Are There Eco-Friendly Cotton Material Options for Cotton Slippers?
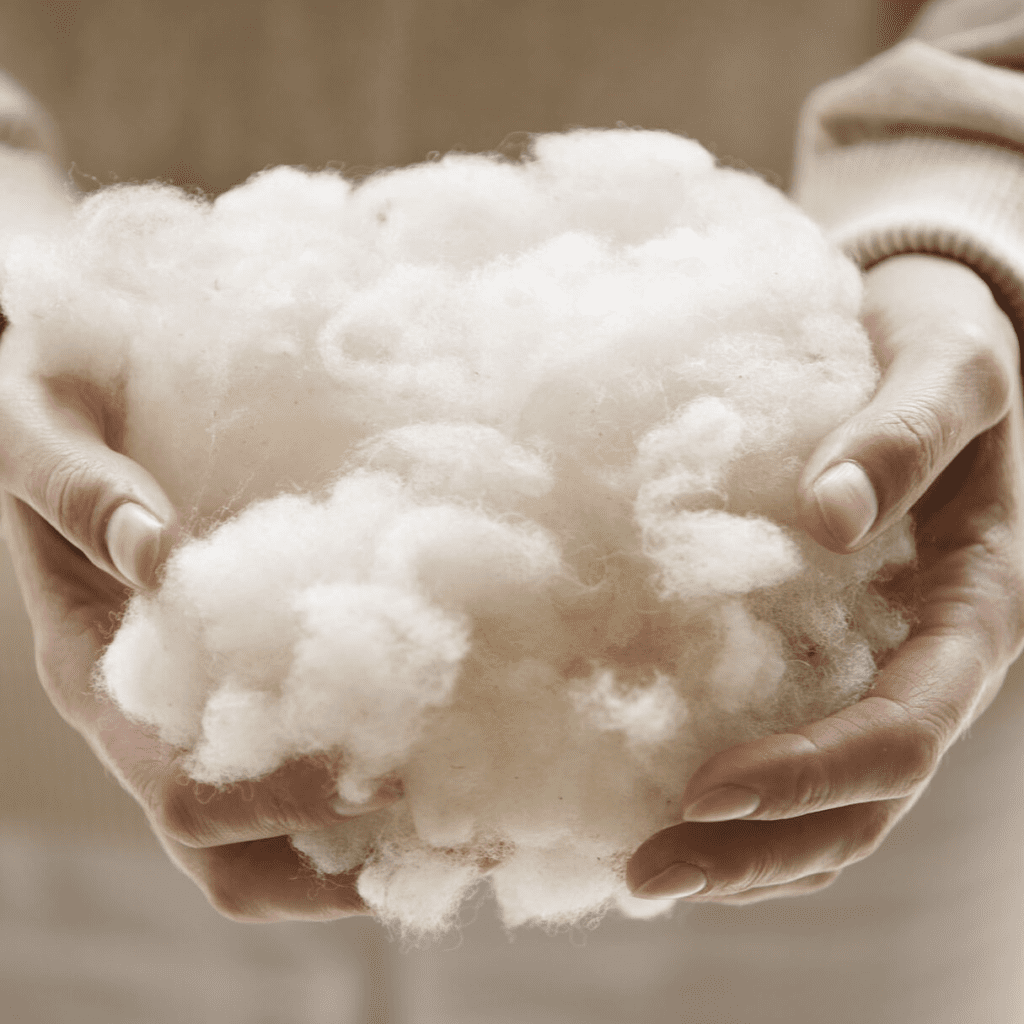
1. **Organic Cotton**
– **Characteristics**: Grown without synthetic pesticides, herbicides, or chemical fertilizers, organic cotton is produced with sustainable farming practices.
– **Environmental Benefits**: Reduces soil and water contamination, improves soil health through crop rotation, and conserves water with more natural growing methods.
– **Result**: Organic cotton is an eco-friendly option for slippers, ideal for environmentally conscious consumers seeking natural, non-toxic materials.
2. **Recycled Cotton**
– **Characteristics**: Made from post-industrial or post-consumer cotton waste, recycled cotton reduces the need for new cotton production.
– **Environmental Benefits**: Diverts waste from landfills, requires less water and energy than conventional cotton, and supports a circular economy by reusing existing fibers.
– **Result**: Recycled cotton provides a sustainable choice for slippers, conserving resources and minimizing environmental impact.
3. **BCI (Better Cotton Initiative) Cotton**
– **Characteristics**: BCI-certified cotton promotes sustainable cotton farming with a focus on reducing environmental impact, improving farm livelihoods, and adhering to strict ethical standards.
– **Environmental Benefits**: BCI farmers use water and pesticides more efficiently, support biodiversity, and implement practices that improve soil health.
– **Result**: BCI cotton is a responsible choice that supports sustainable farming practices, making it suitable for eco-conscious slipper designs.
4. **Low-Impact Dyed Cotton**
– **Characteristics**: Uses eco-friendly dyes and processing methods that reduce water and chemical consumption.
– **Environmental Benefits**: Minimizes pollution and conserves water, with some dyes being biodegradable and safe for the environment.
– **Result**: Low-impact dyed cotton is ideal for eco-friendly slippers, as it aligns with sustainable production and offers a more environmentally friendly color treatment.
5. **Blends with Natural Fibers**
– **Characteristics**: Cotton can be blended with other natural, sustainable fibers like hemp or bamboo, reducing the reliance on conventional cotton.
– **Environmental Benefits**: Blending with renewable fibers such as hemp or bamboo enhances the eco-friendliness of the slippers, as these fibers grow quickly and require fewer resources.
– **Result**: Cotton blends with natural fibers provide a sustainable alternative, offering durability and reducing the environmental footprint.
5.What Anti-Slip Materials Are Suitable for Cotton Slipper Soles?
1. **Natural Rubber**
– **Characteristics**: Flexible, durable, and naturally grippy, natural rubber provides excellent traction on various surfaces.
– **Benefits**: Biodegradable and eco-friendly, natural rubber is well-suited for both indoor and light outdoor use, adding a sustainable anti-slip option.
– **Best For**: Slippers meant for smooth indoor surfaces, providing a natural and soft feel.
2. **TPR (Thermoplastic Rubber)**
– **Characteristics**: A synthetic blend combining the flexibility of rubber with the durability of plastic, offering long-lasting slip resistance.
– **Benefits**: TPR is lightweight, durable, and has excellent grip on wet and dry surfaces, making it ideal for frequent indoor wear.
– **Best For**: Lightweight slippers with an emphasis on durability and slip resistance, suitable for households with tiled or hardwood floors.
3. **EVA (Ethylene Vinyl Acetate)**
– **Characteristics**: Lightweight, shock-absorbent, and water-resistant, EVA provides a good balance of comfort and grip.
– **Benefits**: EVA is affordable, easy to mold, and provides moderate slip resistance, making it a practical choice for everyday indoor slippers.
– **Best For**: Lightweight indoor slippers with a focus on comfort and affordability, particularly for casual or leisure use.
4. **PU (Polyurethane)**
– **Characteristics**: PU is durable, flexible, and offers a strong grip, especially on smooth or polished surfaces.
– **Benefits**: PU has high abrasion resistance, is long-lasting, and offers good cushioning for added comfort in anti-slip applications.
– **Best For**: Indoor slippers that require additional cushioning and grip, especially in areas with smooth flooring.
5. **Silicone Grip Dots**
– **Characteristics**: Silicone dots can be applied to cotton or fabric soles to create localized anti-slip zones without adding bulk.
– **Benefits**: Highly flexible and soft, silicone dots improve traction while keeping the slipper lightweight and comfortable.
– **Best For**: Lightweight or minimalist slippers where full rubber or synthetic outsoles would be too heavy or bulky, ideal for indoor-only use.
6. **Cork with Rubber Grip**
– **Characteristics**: A cork sole with a rubberized grip layer offers natural shock absorption and decent traction.
– **Benefits**: Cork is sustainable and lightweight, while the added rubber layer enhances slip resistance.
– **Best For**: Eco-friendly slippers for low-impact indoor use, offering both comfort and anti-slip properties with minimal environmental impact.
7. **Microfiber or Suede with Anti-Slip Coating**
– **Characteristics**: Microfiber or suede fabric coated with anti-slip treatments can add traction without adding significant weight.
– **Benefits**: Maintains the softness and flexibility of fabric soles while providing enough grip for light indoor use.
– **Best For**: Low-profile, flexible indoor slippers, especially for carpeted or lightly textured floors.
6.Are Cotton Slippers easy to Pilling?
1. **Material Composition**
– **Pure Cotton**: 100% cotton is generally less prone to pilling compared to synthetic fibers, as natural fibers don’t tend to form pills as easily. However, friction can still lead to some pilling over time.
– **Cotton Blends**: Cotton blended with synthetic fibers like polyester or spandex may be more prone to pilling, as synthetic fibers can increase the formation of pills when exposed to friction.
– **Result**: Pure cotton slippers are less likely to pill, while blended fabrics may show pilling faster with regular use.
2. **Fabric Type**
– **Terry Cotton**: The looped texture of terry cotton is more susceptible to pilling, especially in high-friction areas, due to the structure of the loops.
– **Brushed Cotton (e.g., Flannel)**: Brushed cotton fibers are raised for softness, which can lead to pilling in areas that experience regular contact or abrasion.
– **Result**: Certain cotton types, like terry and brushed cotton, may pill more than tightly woven cotton fabrics.
3. **Frequency and Type of Use**
– **Heavy Use**: Cotton slippers worn frequently, especially on rough surfaces, may experience pilling faster due to continuous friction.
– **Indoor Surfaces**: Wearing cotton slippers on soft surfaces (e.g., carpets) may reduce pilling, while harder floors can increase abrasion.
– **Result**: Frequent use, especially on hard or rough surfaces, can lead to faster pilling on cotton slippers.
4. **Care and Maintenance**
– **Washing**: Machine washing, especially in hot water or with rough cycles, can cause pilling as fibers rub against each other.
– **Drying**: Air drying or gentle drying cycles help prevent pilling, as high-heat drying can damage fibers and cause pilling.
– **Result**: Gentle washing and drying routines help reduce pilling by minimizing fabric abrasion and protecting fiber integrity.
5. **Quality of Cotton Fabric**
– **High-Quality Cotton**: Long-staple cotton fibers are less prone to pilling compared to shorter fibers, as they are stronger and less likely to break.
– **Organic Cotton**: Often processed with fewer harsh chemicals, organic cotton may maintain fiber integrity longer, reducing pilling.
– **Result**: High-quality cotton with long fibers, like Egyptian or Pima cotton, is less likely to pill and maintains a smoother surface.
7.Can Natural Dyes Be Used in Slipper Production?
1. **Compatibility with Materials**
– **Cotton and Natural Fibers**: Natural dyes work well with cotton and other natural fibers, as they bond effectively through natural mordants like alum.
– **Synthetic Materials**: Natural dyes are generally less effective on synthetic materials like polyester, which require chemical dyes for strong, lasting colors.
– **Result**: Natural dyes are suitable for cotton and natural fiber-based slippers, but not ideal for synthetic components in the same product.
2. **Environmental Benefits**
– **Eco-Friendly**: Natural dyes, derived from plants, minerals, and insects, reduce the environmental impact by minimizing chemical runoff and pollution.
– **Biodegradability**: Being organic, natural dyes break down more easily in the environment compared to synthetic dyes.
– **Result**: Natural dyes offer a sustainable, environmentally friendly option for eco-conscious brands, aligning with green production values.
3. **Health and Safety Advantages**
– **Non-Toxic**: Natural dyes are less likely to cause skin irritation or allergic reactions, making them a safer option for consumers, particularly those with sensitive skin.
– **Reduced Chemical Exposure**: Workers and the environment benefit from reduced exposure to toxic chemicals found in synthetic dye processes.
– **Result**: Slippers dyed with natural colors are safer for both users and the environment, providing a healthier choice.
4. **Color Range and Longevity**
– **Natural Tones**: Natural dyes typically produce earth-toned shades (e.g., greens, browns, yellows, and muted reds) rather than bright or neon colors.
– **Fade Resistance**: Natural dyes may fade faster than synthetic dyes, especially with frequent washing or exposure to sunlight, requiring extra care for color retention.
– **Result**: Natural dyes are ideal for earthy, muted colors; however, durability and fade resistance may be a concern, particularly for everyday use.
5. **Cost and Availability**
– **Higher Production Costs**: Natural dyeing can be more labor-intensive and costly, as the sourcing and preparation of natural dye materials are often less efficient than synthetic dye production.
– **Availability**: Certain natural dye sources are seasonal or geographically limited, affecting production scalability and consistency.
– **Result**: Natural dyeing may increase production costs and limit color availability, making it more viable for small-batch or premium eco-friendly slipper lines.
6. **Production and Quality Control Challenges**
– **Batch Variability**: Natural dye results can vary between batches, leading to inconsistencies in color across product runs.
– **Specialized Equipment and Skills**: Natural dyeing may require specific equipment and skilled artisans, adding complexity to production.
– **Result**: Color consistency and quality control can be challenging with natural dyes, requiring careful management and specialized processes.
8.What Are the Differences of Cotton Slippers Designed for Summer and Winter?
1. **Fabric Weight and Thickness**
– **Summer Slippers**: Use lightweight, breathable cotton fabric to promote airflow and reduce heat retention. Often made with thinner layers and less padding to keep feet cool.
– **Winter Slippers**: Thicker cotton or cotton blends, often lined or padded for extra warmth. Fleece or flannel linings are common to increase insulation.
– **Result**: Fabric weight is adjusted seasonally, with thinner materials for summer and thicker, insulating layers for winter.
2. **Breathability and Moisture-Wicking**
– **Summer Slippers**: Enhanced focus on breathability and moisture-wicking to keep feet dry and comfortable. Designs may feature open-toe styles or mesh panels for added ventilation.
– **Winter Slippers**: While comfort is still key, winter designs prioritize warmth over maximum airflow. Closed-toe styles are common to trap warmth, though moisture-wicking is maintained to prevent dampness.
– **Result**: Summer slippers prioritize airflow, while winter slippers focus on warmth retention with controlled breathability.
3. **Sole and Cushioning**
– **Summer Slippers**: Lightweight and flexible soles to enhance comfort and keep the slippers easy to wear. Minimal cushioning is preferred to keep them breathable and avoid trapping heat.
– **Winter Slippers**: Thicker, more cushioned soles to provide insulation from cold floors. Some winter slippers may feature memory foam or fleece padding for extra warmth and softness.
– **Result**: Summer slippers have lighter, cooler soles, while winter slippers feature thicker, insulated cushioning for added warmth.
4. **Design and Structure**
– **Summer Slippers**: Open-toe or slip-on designs are common to enhance ventilation. Cotton or cotton-mesh uppers are popular to maximize airflow and comfort.
– **Winter Slippers**: Closed-toe and full-coverage designs trap heat, often with additional lining or padding to retain warmth. High-back designs may also be used to cover more of the foot.
– **Result**: Summer slippers are open and breathable, while winter slippers provide fuller coverage for warmth.
5. **Lining Materials**
– **Summer Slippers**: Typically unlined or lined with lightweight, breathable materials to maximize coolness.
– **Winter Slippers**: Lined with warm fabrics like fleece, sherpa, or flannel to trap heat and increase comfort in colder weather.
– **Result**: Lining materials are chosen based on seasonal needs, with cool linings for summer and warm, insulating linings for winter.
6. **Color and Aesthetic Choices**
– **Summer Slippers**: Often feature bright or pastel colors, and lighter designs that align with warm-weather aesthetics.
– **Winter Slippers**: Typically have darker, cozier color schemes, with colors that evoke warmth and comfort, like deep blues, grays, and earth tones.
– **Result**: Color and style choices reflect seasonal aesthetics, with light, refreshing colors for summer and warm, cozy tones for winter.
9.How to let Cotton Slippers Be More Breathable?
1. **Use Lightweight and Thin Cotton Fabric**
– **Method**: Choose lightweight, thinner cotton fabric to improve airflow and reduce heat retention.
– **Result**: Thinner cotton allows air to circulate more freely, preventing feet from feeling hot and stuffy, especially in warmer climates.
2. **Incorporate Mesh Panels or Ventilation Holes**
– **Method**: Add mesh panels, perforations, or ventilation holes on the upper or sides of the slippers to increase airflow.
– **Result**: Mesh panels allow fresh air in and moisture out, keeping feet cool and reducing sweat buildup.
3. **Open-Toe and Open-Back Designs**
– **Method**: Use open-toe or open-back designs that expose parts of the foot, allowing more air circulation.
– **Result**: Open designs naturally increase breathability, preventing feet from overheating and improving comfort in hot weather.
4. **Choose Moisture-Wicking Linings**
– **Method**: Line the interior of the slipper with moisture-wicking materials such as bamboo fiber or moisture-wicking cotton blends.
– **Result**: These materials draw moisture away from the skin, keeping feet dry and comfortable, reducing dampness that can feel suffocating.
5. **Use Natural, Breathable Insoles**
– **Method**: Choose insoles made from natural, breathable materials like cork or natural latex, which offer breathability and absorb moisture.
– **Result**: Breathable insoles help prevent sweat buildup and improve ventilation within the slipper, enhancing overall comfort.
6. **Reduce Cushioning Layers**
– **Method**: Limit the use of thick cushioning or multiple padding layers, which can trap heat and reduce breathability.
– **Result**: Minimizing padding keeps slippers light and airy, improving airflow and reducing the chance of overheating.
7. **Consider Perforated or Loosely Woven Cotton**
– **Method**: Use perforated or loosely woven cotton fabric that naturally allows air to pass through more easily.
– **Result**: These fabrics increase ventilation by allowing air to penetrate the fabric, keeping feet cool and comfortable.
8. **Add Antimicrobial Treatments to Control Odor**
– **Method**: Apply antimicrobial treatments or use materials with natural antibacterial properties to reduce bacteria and odor buildup.
– **Result**: Controlling odor indirectly supports breathability, as odor-causing bacteria thrive in moist, less breathable environments.
1.What are the Process of Initial Design and Sample Production for Cotton Slippers?
1. **Market Research and Concept Development**
– **Objective**: Research current trends, target audience preferences, and competitor products to understand design direction and functionality needs.
– **Activities**: Identify key features, materials, colors, and styles that will appeal to the target market. Create a concept outline for the slipper, including sketches or mood boards.
– **Result**: A clear design concept and style guide that defines the look, feel, and features of the cotton slipper.
2. **Material Selection**
– **Objective**: Choose materials that match the design concept and meet functional requirements, such as breathability, durability, and comfort.
– **Activities**: Source different types of cotton fabrics (e.g., terry, flannel, organic cotton), sole materials (rubber, EVA, TPR), and linings. Evaluate fabric samples for quality, texture, and color.
– **Result**: A finalized list of materials, including fabric, linings, and sole materials, that align with the design’s goals for quality and comfort.
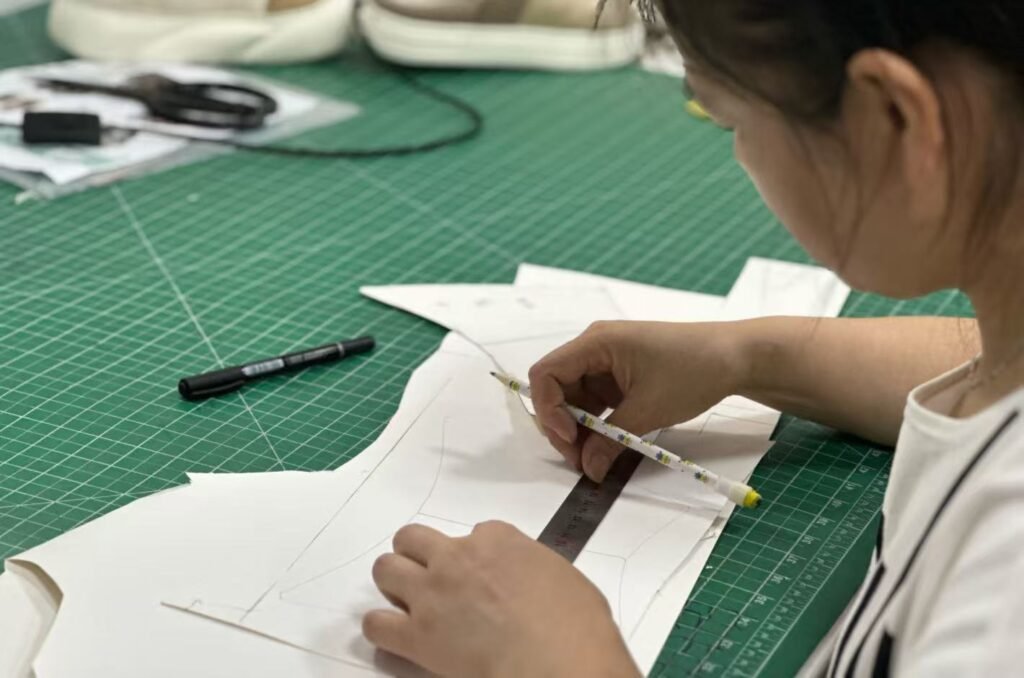
3. **Creating Initial Technical Drawings and Specs**
– **Objective**: Produce technical drawings and specifications that guide the sample-making process.
– **Activities**: Work with a designer or technical specialist to create detailed technical drawings, including dimensions, stitching lines, sole thickness, and color placements.
– **Result**: Technical specifications that clearly outline the construction details, ensuring the design vision can be accurately executed in the sample.
4. **Prototype Development**
– **Objective**: Produce an initial prototype of the slipper based on the technical drawings and material selections.
– **Activities**: The sample team constructs a prototype, following specifications for fabric cutting, stitching, sole attachment, and final assembly. Any unique features (e.g., embroidery, branding) are added at this stage.
– **Result**: An initial physical sample that represents the look and feel of the final product, allowing the design team to evaluate shape, comfort, and aesthetics.
5. **Sample Review and Testing**
– **Objective**: Assess the initial sample for quality, fit, comfort, and overall design to identify any necessary adjustments.
– **Activities**: Conduct wear tests to check breathability, durability, and fit. The design team examines the sample for color accuracy, stitching quality, and material performance.
– **Result**: Feedback on the initial sample, noting areas that require changes or improvements, such as fit adjustments, color tweaks, or material modifications.
6. **Revisions and Sample Refinement**
– **Objective**: Make necessary revisions to the design and create additional samples as needed.
– **Activities**: Update technical drawings, adjust materials, or modify construction techniques based on feedback. Produce a second sample to verify improvements.
– **Result**: A refined sample that accurately represents the final design, incorporating all necessary adjustments to meet quality standards.
7. **Final Sample Approval**
– **Objective**: Confirm that the sample meets all design, comfort, and quality expectations, readying it for mass production.
– **Activities**: Conduct a final quality check, confirm material performance, and ensure brand standards are met. Obtain approvals from the design and production teams.
– **Result**: A final, approved sample that serves as the production prototype, guiding the manufacturing process to ensure consistency in the final product.
2.How Are Materials Selected and Procured for Cotton Slippers? What Standards Are Used?
1. **Material Research and Selection Criteria**
– **Objective**: Identify materials that meet the design and functional requirements, such as comfort, durability, and breathability.
– **Criteria**:
– **Comfort and Softness**: Materials like cotton terry or flannel are chosen for softness against the skin.
– **Breathability**: Lightweight, natural cotton fabrics are prioritized to enhance airflow.
– **Durability**: Fabrics and soles are evaluated for abrasion resistance and longevity to ensure lasting quality.
– **Result**: A shortlist of materials that align with the product’s design goals, ensuring comfort, functionality, and customer satisfaction.
2. **Sourcing Sustainable and High-Quality Cotton**
– **Objective**: Ensure that materials are responsibly sourced, using eco-friendly options where possible.
– **Standards**:
– **Organic Cotton**: GOTS (Global Organic Textile Standard) certified cotton is prioritized for sustainability and reduced environmental impact.
– **Recycled Cotton**: Materials certified by organizations like the Global Recycled Standard (GRS) verify that recycled content is authentic and sustainable.
– **BCI (Better Cotton Initiative)**: Cotton from BCI supports environmentally friendly and socially responsible cotton farming practices.
– **Result**: Responsibly sourced materials enhance the slipper’s appeal to eco-conscious consumers while ensuring quality.
3. **Evaluating Supplier Reliability and Quality Assurance**
– **Objective**: Partner with reliable suppliers who can consistently provide high-quality materials.
– **Standards**:
– **Certifications**: Suppliers with ISO 9001 or similar certifications demonstrate adherence to quality management systems.
– **Reputation and Track Record**: Suppliers are evaluated based on past performance, feedback from other clients, and quality assurance processes.
– **Sample Testing**: Initial material samples undergo physical testing for consistency, durability, and color fastness.
– **Result**: Reliable suppliers ensure a steady supply of materials that meet quality standards, minimizing production delays and defects.
4. **Cost and Budget Considerations**
– **Objective**: Choose materials that fit within budget constraints without compromising essential qualities.
– **Standards**:
– **Cost-Effectiveness**: Material choices balance cost with quality, focusing on fabrics and soles that provide durability at reasonable prices.
– **Bulk Order Discounts**: Negotiations are made with suppliers to secure cost-effective rates, especially for large orders.
– **Total Cost of Ownership**: Includes considerations of shipping, storage, and potential wastage, ensuring overall cost efficiency.
– **Result**: Material choices align with budget goals, maintaining affordability for the target market.
5. **Compliance with Health and Safety Standards**
– **Objective**: Ensure materials are safe for both workers and end consumers.
– **Standards**:
– **REACH Compliance (EU)**: Ensures materials are free from hazardous chemicals, protecting consumer health.
– **Oeko-Tex Standard 100**: Materials certified to this standard are tested for harmful substances, making them safe for direct skin contact.
– **Antibacterial Properties**: If applicable, materials with antibacterial treatments must meet safety and efficacy standards.
– **Result**: Safe materials ensure compliance with health regulations, enhancing the product’s appeal to consumers with sensitive skin or health concerns.
6. **Environmental and Social Responsibility Audits**
– **Objective**: Select suppliers who follow environmentally sustainable and socially responsible practices.
– **Standards**:
– **Environmental Management (ISO 14001)**: Ensures suppliers have systems in place to minimize environmental impact.
– **Fair Trade or Ethical Certifications**: Ensures that suppliers adhere to fair labor practices, supporting social sustainability.
– **Carbon Footprint Reduction**: Preference for materials produced with low carbon emissions or eco-friendly processes.
– **Result**: Partnering with responsible suppliers aligns the product with sustainable practices, appealing to environmentally and socially conscious consumers.
7. **Logistics and Supply Chain Efficiency**
– **Objective**: Ensure timely delivery of materials, keeping production schedules on track.
– **Standards**:
– **Proximity of Supplier**: Whenever possible, local or regional suppliers are preferred to reduce lead times and transportation costs.
– **Consistent Supply Agreements**: Long-term contracts with suppliers ensure stable supply and minimize the risk of shortages.
– **Flexible Shipping Options**: Ensuring suppliers can handle urgent or scaled-up orders to support production needs.
– **Result**: Efficient supply chain planning prevents material shortages, supporting timely production and minimizing delays.
3.How Can Accurate and Consistent Sizing of Each Component Be Ensured During the Cutting Process?
1. **Use of Cutting Patterns and Templates**
– **Method**: Develop precise templates or cutting patterns for each component, using durable materials like metal or reinforced plastic to prevent warping.
– **Benefits**: Templates guide the cutting process, ensuring each piece matches the intended size and shape.
– **Result**: Consistency in size and shape is maintained across all pieces, as templates standardize dimensions.
2. **Laser or Die Cutting Machines**
– **Method**: Use laser cutting or die-cutting machines, which follow programmed dimensions and automatically cut materials with high precision.
– **Benefits**: Automated machines reduce human error and ensure consistent, repeatable results across large batches.
– **Result**: Accurate dimensions are achieved for each part, particularly for complex shapes or high-volume production.
3. **Quality Control Checkpoints During Cutting**
– **Method**: Conduct regular quality checks during the cutting process to measure and confirm component dimensions against specifications.
– **Benefits**: Early detection of size discrepancies minimizes waste and prevents incorrect pieces from moving forward in production.
– **Result**: Continuous monitoring ensures that any inconsistencies are identified and corrected immediately.
4. **Digital Pattern Grading Systems**
– **Method**: Use digital grading software to create scaled versions of patterns for various sizes, ensuring that each size maintains accurate proportions.
– **Benefits**: Digital systems improve accuracy in creating multiple sizes, reducing sizing errors and ensuring consistency across all variations.
– **Result**: Precision in graded sizes guarantees that each part aligns accurately during assembly, especially in products with multiple size options.
5. **Sharp, Well-Maintained Cutting Tools**
– **Method**: Ensure that all cutting tools are regularly sharpened and maintained to prevent uneven cuts or frayed edges.
– **Benefits**: Sharp tools improve cutting accuracy, reduce material stretching, and prevent inconsistent cuts caused by tool wear.
– **Result**: Clean, precise cuts across all components enhance consistency and reduce material wastage.
6. **Efficient Material Layout and Cutting Plan**
– **Method**: Plan material layouts to optimize cutting paths, reducing fabric shifting and aligning pieces for accurate cuts.
– **Benefits**: A well-organized cutting layout minimizes fabric movement and improves the accuracy of each piece, especially in complex designs.
– **Result**: Efficient layout planning maintains dimensional accuracy and reduces waste by maximizing material usage.
7. **Standard Operating Procedures (SOPs) for Manual Cutting**
– **Method**: Develop SOPs detailing each step of the manual cutting process, including instructions for aligning, measuring, and checking each cut.
– **Benefits**: SOPs ensure that workers follow consistent methods, reducing the chance of human error in hand-cut components.
– **Result**: Consistency in manual cutting processes improves the uniformity of each part, particularly in low-volume or custom orders.
8. **Final Measurement Verification and Stacking**
– **Method**: After cutting, stack and measure parts in batches to confirm that all components meet dimensional specifications.
– **Benefits**: Batch measurements ensure consistent sizing and reveal any outliers that need recutting or adjustment.
– **Result**: Final verification provides an additional layer of quality assurance, ensuring each component’s accuracy before assembly.
4.Is Machinery Used in the Cotton Cutting Process?
1. **Automatic Fabric Cutting Machines**
– **Usage**: Automated cutting machines, such as CNC (Computer Numerical Control) or CAD (Computer-Aided Design) cutters, are widely used for high precision and consistency.
– **Benefits**: These machines allow for fast, accurate cuts with minimal human intervention, ideal for large-scale production.
– **Example**: CAD cutting machines use pre-programmed patterns, making it easy to achieve uniform cuts across large quantities.
2. **Laser Cutting Machines**
– **Usage**: Laser cutters use a focused beam of light to cut fabric with high precision, especially useful for complex patterns or shapes.
– **Benefits**: Laser cutting provides clean edges and is effective in minimizing fabric fraying, which is especially useful in cotton slipper production.
– **Example**: Laser cutters can handle intricate designs without physically touching the fabric, reducing the risk of fabric distortion.
3. **Die Cutting Machines**
– **Usage**: Die-cutting machines use custom-made molds or dies to cut fabric pieces quickly, ensuring uniformity in shape and size.
– **Benefits**: Ideal for repetitive cuts, die cutting offers high efficiency and precision, especially for components like soles or upper panels.
– **Example**: Die cutters are often used in medium to large-scale production, where consistent shapes are essential across batches.
4. **Straight Knife Cutting Machines**
– **Usage**: A straight knife cutting machine is a manually operated machine with a vertical blade, often used for layered fabric cutting.
– **Benefits**: Straight knife machines can cut through multiple layers at once, providing efficiency in bulk fabric cutting.
– **Example**: Often used in the preliminary cutting stages, especially when patterns don’t require intricate details.
5. **Band Knife Cutting Machines**
– **Usage**: A band knife cutting machine uses a continuous loop blade, suitable for precision cutting on stacked fabric layers.
– **Benefits**: Band knives offer controlled, smooth cuts with high precision, allowing for accurate cutting in layered setups.
– **Example**: Band knives are ideal for detailed cuts on soft materials like cotton and are frequently used in higher-end production.
6. **Manual Cutting Tools**
– **Usage**: Smaller production setups or custom designs may use manual tools like rotary cutters or scissors.
– **Benefits**: Provides flexibility in small-batch or custom orders, allowing adjustments in patterns and shapes.
– **Example**: Rotary cutters are popular for small-batch or prototype cutting, though they are time-consuming for large-scale production.
5.Is the edge of the fabric treated after cutting to prevent unraveling or pilling?
1. **Overlocking (Serging)**
– **Method**: An overlock or serger machine stitches over the edge of the fabric, securing it with multiple threads that wrap around the edge.
– **Benefits**: Creates a durable, professional finish that prevents fraying and is effective on all edges, even curved or intricate shapes.
– **Best For**: High-wear areas of cotton slippers, such as seams and outer edges, where durability is essential.
2. **Binding**
– **Method**: A strip of fabric, typically bias tape or a similar material, is sewn around the raw edges, encasing them fully.
– **Benefits**: Adds extra reinforcement and a clean, decorative finish. Binding is particularly useful for visible edges or where added strength is needed.
– **Best For**: Edges that experience frequent handling, such as the slipper opening or around the sole, providing a smooth, finished look.
3. **Pinking Shears**
– **Method**: Pinking shears cut the fabric in a zigzag pattern, which helps prevent fraying by interrupting the edge fiber structure.
– **Benefits**: Quick and effective for edges that won’t experience heavy wear, though it may not be as durable as other methods.
– **Best For**: Inner edges or lining pieces in small-batch or custom production, where a simple fray-resistant edge is needed.
4. **Zigzag Stitching**
– **Method**: A sewing machine applies a zigzag stitch along the fabric edge, which holds fibers in place and reduces fraying.
– **Benefits**: Flexible and can be adjusted for various fabrics, providing an economical option for small to medium production.
– **Best For**: Inner seams or hidden edges that need moderate protection without the bulk of binding or serging.
5. **Heat Sealing (For Blended Fabrics)**
– **Method**: For cotton blends containing synthetic fibers, heat is applied to the edges to slightly melt and seal them.
– **Benefits**: Creates a smooth, fray-resistant edge on cotton-polyester blends, though it is not suitable for 100% cotton.
– **Best For**: Synthetic or blended fabrics used in the slipper’s internal components, particularly when durability is required.
6. **Turned and Stitched Hem**
– **Method**: The fabric edge is folded over and stitched down, creating a clean, double-layer edge that prevents fraying.
– **Benefits**: Provides a smooth, reinforced edge that enhances durability, though it can be time-consuming in large production.
– **Best For**: High-end or visible edges where a neat, professional finish is desired, adding to the slipper’s overall aesthetic.
6.When sewing, what types of needles and threads are used to ensure firmness?
1. **Needle Types**
– **Universal Needle**
– **Size**: Typically 80/12 or 90/14 for cotton fabric.
– **Characteristics**: Has a slightly rounded tip, making it suitable for a variety of fabrics, including medium-weight cotton.
– **Benefits**: Versatile and gentle on cotton fabric, preventing snags while providing clean stitching.
– **Best For**: General seams and non-stretch areas in cotton slippers.
– **Ballpoint Needle**
– **Size**: Commonly 80/12 for medium-weight cotton.
– **Characteristics**: Has a rounded tip designed to slip between fabric threads rather than piercing them, reducing fabric damage.
– **Benefits**: Ideal for thicker, knit cotton materials, especially when combined with flexible linings.
– **Best For**: Areas where flexibility and resilience are needed, such as around the slipper opening.
– **Jeans/Denim Needle**
– **Size**: 90/14 or 100/16, suitable for dense or multi-layered sections.
– **Characteristics**: Stronger and sharper, capable of penetrating thicker layers without breaking.
– **Benefits**: Essential for areas with multiple layers or heavy-duty reinforcement, such as around the sole attachment.
– **Best For**: Reinforced sections and joining thick components, ensuring stitches remain strong.
2. **Thread Types**
– **Polyester Thread**
– **Characteristics**: Strong, flexible, and resistant to stretching and shrinking. Polyester threads come in a variety of thicknesses and are colorfast.
– **Benefits**: Provides durability and holds up well under stress, making it suitable for areas subject to high tension.
– **Best For**: Main seams, including areas around the sole and upper, ensuring long-lasting hold.
– **Cotton-Wrapped Polyester Thread**
– **Characteristics**: Combines the strength of polyester with a soft cotton coating, blending well with cotton fabric.
– **Benefits**: Offers the strength of polyester with a softer appearance, ideal for visible stitching on cotton materials.
– **Best For**: Decorative stitching or visible seams where durability and aesthetic alignment with cotton are important.
– **Nylon Thread**
– **Characteristics**: Highly durable, smooth, and slightly elastic, making it suitable for flexible or heavy-duty areas.
– **Benefits**: Provides stretch without breaking, making it ideal for high-stress points or areas that require movement.
– **Best For**: Reinforced seams or areas with frequent flexing, such as the heel or toe sections.
– **Heavy-Duty Upholstery Thread**
– **Characteristics**: Thicker and stronger than standard sewing thread, often made from bonded polyester or nylon.
– **Benefits**: Excellent for heavy-use areas where high durability is critical.
– **Best For**: Attaching soles or reinforcing seams in areas that experience high wear, such as the slipper’s sole attachment.
3. **Stitching Techniques for Enhanced Strength**
– **Double Stitching**: Commonly used on high-stress areas, providing extra durability and preventing seam splitting.
– **Topstitching**: Adds reinforcement along the edges, enhancing the structural integrity and visual appeal.
– **Zigzag Stitching**: Used to secure edges and provide flexibility in areas that need stretch, like the slipper opening.
7.After sewing is completed, is a quality inspection carried out to ensure the neatness of the stitching line?
1. **Visual Inspection for Stitch Alignment and Consistency**
– **Objective**: Check that all stitching lines are straight, even, and consistent, without skipped or uneven stitches.
– **Process**:
– Inspect each seam visually to confirm that stitching is aligned with the design specifications.
– Examine visible stitching, like topstitching, for evenness, uniform stitch length, and thread consistency.
– **Result**: Ensures that visible stitching looks clean and professional, meeting the quality expectations of the finished product.
2. **Tension and Strength Testing on Seams**
– **Objective**: Verify that seams are strong and that threads are correctly tensioned to prevent loosening or breaking under stress.
– **Process**:
– Manually apply gentle stress to key seams, such as those around the sole and upper, to confirm durability.
– Check for any loose or weak threads that could affect the slipper’s integrity.
– **Result**: Ensures seam strength, preventing thread breakage and ensuring a long-lasting, durable product.
3. **Trim Excess Threads and Frayed Edges**
– **Objective**: Remove any stray or excess threads to maintain a clean, polished look.
– **Process**:
– Inspect each seam to identify excess threads or fraying, using scissors or thread trimmers to tidy up the edges.
– Confirm that the ends of all threads are securely trimmed and fastened to avoid unraveling.
– **Result**: A clean and professional finish, with no loose threads or fraying, enhances the product’s aesthetic and durability.
4. **Check Stitch Density and Reinforcement in High-Stress Areas**
– **Objective**: Confirm that areas prone to wear, like the toe and heel seams, have sufficient stitch density and reinforcement.
– **Process**:
– Count stitches per inch (SPI) to ensure consistency with design specifications.
– Inspect reinforced areas, such as double-stitched or bar-tacked sections, to verify strength.
– **Result**: Reinforced stitching in high-stress areas increases product durability and minimizes the risk of seam splitting.
5. **Inspect for Stitch Irregularities or Defects**
– **Objective**: Identify any skipped stitches, loose loops, or uneven threading that could compromise quality.
– **Process**:
– Use magnification tools if necessary to spot small defects, particularly in intricate or detailed stitching.
– Mark defective sections for repair or replacement if necessary.
– **Result**: Ensures flawless stitching without irregularities, maintaining the slipper’s overall quality.
6. **Final Approval and Documentation**
– **Objective**: Document the inspection results, approving items that meet quality standards and marking any defects for rework.
– **Process**:
– Maintain a checklist of quality points, marking each item that passes inspection.
– Set aside items with stitching or structural flaws for additional review or rework.
– **Result**: A quality assurance record that ensures each slipper meets the established standards for stitching and construction.
8.How do you hold the different parts of the slippers together during assembly?Glue?
1. **Sewing and Stitching**
– **Method**: The primary technique for joining the upper, insole, and sole, especially for fabric-based slippers like cotton slippers.
– **Process**:
– The upper part of the slipper is sewn to the insole or footbed using straight stitching, reinforced stitching, or zigzag stitching for flexibility.
– The sole is then attached, often with a strong double stitch around the perimeter for durability.
– **Result**: Sewing provides a secure, flexible connection, ideal for areas that need a strong, flexible hold, such as the upper-to-sole connection.
2. **Adhesive Bonding (Glue)**
– **Method**: Strong adhesives, often hot-melt or water-based glues, are used to bond the sole to the insole or footbed.
– **Process**:
– Apply adhesive evenly on the insole and sole surfaces, then press them together using a machine or hand pressure.
– Adhesives are cured or set under specific conditions (e.g., heat or pressure) to ensure a firm, lasting bond.
– **Result**: Adhesive bonding provides a seamless connection, particularly effective for sole attachment and waterproofing, and is widely used for a smooth finish.
3. **Heat Pressing and Vulcanization (for Rubber Soles)**
– **Method**: Heat pressing is used to bond rubber or synthetic soles to the insole, using a combination of heat and pressure to create a strong connection.
– **Process**:
– The sole and insole are placed in a press machine that applies heat and pressure, causing materials to fuse together, especially for rubber or synthetic-based soles.
– This process is often combined with adhesive for added strength.
– **Result**: Heat pressing provides a highly durable and seamless connection, commonly used in slippers that need extra resilience.
4. **Stitch-and-Glue Combination**
– **Method**: A combination of sewing and adhesive is used in areas that require additional durability, such as the perimeter of the sole or high-stress points.
– **Process**:
– Apply a layer of adhesive between the insole and sole, then stitch around the edges to reinforce the bond.
– This technique is often used where extra
9.What kind of inspections will be done on finished slippers?
1. **Visual Shape Inspection**
– **Objective**: Confirm that the overall shape matches design specifications and appears symmetrical and balanced.
– **Process**:
– Inspect each slipper manually to ensure proper alignment, symmetry, and shape conformity.
– Look for irregularities in stitching, contours, or any deformations that may have occurred during assembly.
– **Result**: Ensures the final product has a consistent shape that aligns with design requirements, giving the slippers a neat, professional appearance.
2. **Dimensional Measurement**
– **Objective**: Verify that the length, width, and height of the slippers match size specifications accurately.
– **Process**:
– Use measuring tools (e.g., calipers, rulers, or specialized foot templates) to measure each slipper against standardized size charts.
– Check both the left and right slippers individually to confirm consistent sizing.
– **Result**: Ensures each slipper pair is accurately sized according to industry standards, reducing variability across production batches.
3. **Fit Testing on Size Molds**
– **Objective**: Ensure that each slipper comfortably fits standardized foot molds for each designated size.
– **Process**:
– Place slippers on foot molds corresponding to each size to confirm a proper fit in terms of length, width, and arch support.
– Inspect for any tight spots, excessive looseness, or inconsistencies in fit around the heel and toe areas.
– **Result**: Ensures slippers maintain comfortable, accurate sizing that fits the intended foot dimensions across all sizes.
4. **Symmetry and Alignment Check**
– **Objective**: Ensure that both slippers in a pair match each other in shape, size, and alignment.
– **Process**:
– Place slippers side by side to confirm they are symmetrical in shape and length, with no noticeable discrepancies.
– Confirm that stitching lines, sole positioning, and any decorative elements are aligned correctly on both slippers.
– **Result**: Guarantees a cohesive and consistent look for each slipper pair, ensuring customer satisfaction.
5. **Flexibility and Structural Integrity Test**
– **Objective**: Verify that the slippers maintain structural integrity and flexibility without deforming when bent or flexed.
– **Process**:
– Flex the slippers at key points, especially around the arch and toe areas, to ensure they hold their shape and don’t easily collapse.
– Confirm that stitching and glued areas remain intact after flexing, ensuring durability and resilience.
– **Result**: Ensures slippers withstand normal wear and retain their shape and size, supporting long-term comfort and durability.
6. **Weight and Balance Check**
– **Objective**: Confirm that each slipper has consistent weight and balance, avoiding imbalances that affect comfort.
– **Process**:
– Weigh each slipper to confirm uniform weight within acceptable tolerance levels.
– Check for balance by placing each slipper on a flat surface and confirming even contact with the ground.
– **Result**: Ensures each slipper feels balanced and stable, preventing discomfort during wear.
7. **Final Size Tag Verification and Labeling**
– **Objective**: Ensure each slipper is labeled accurately according to its size, avoiding mix-ups.
– **Process**:
– Verify the size label on each slipper matches the measured dimensions and standardized size chart.
– Double-check all tags, including any width or fit designations, to prevent size mislabeling.
– **Result**: Guarantees size accuracy on labels, reducing potential customer dissatisfaction due to sizing issues.

Lining filler Selection
1.What are the commonly used lining fillers?
1. **Fleece**
– **Characteristics**: Soft, warm, and moisture-wicking, providing a cozy feel ideal for colder seasons.
– **Benefits**: Retains warmth effectively and feels plush against the skin, making it popular for winter slippers.
– **Best For**: Slippers intended for indoor use during colder months, where warmth is a priority.
2. **Cotton Terry**
– **Characteristics**: Absorbent and breathable, made from looped cotton fibers similar to towel material.
– **Benefits**: Keeps feet dry by absorbing moisture, making it comfortable for extended wear in warm weather.
– **Best For**: Summer or bath slippers, offering comfort and breathability without causing overheating.
3. **Sherpa**
– **Characteristics**: Synthetic, wool-like material that is soft, plush, and warm, providing a luxurious feel.
– **Benefits**: Mimics the warmth and softness of wool, offering excellent insulation without the high maintenance.
– **Best For**: Winter slippers or indoor slippers designed for extra warmth and comfort.
4. **Microfiber**
– **Characteristics**: Made from fine synthetic fibers, microfiber is smooth, soft, and resistant to moisture and dirt.
– **Benefits**: Durable and easy to clean, with a smooth texture that feels soft against the skin.
– **Best For**: Everyday slippers, especially those requiring easy maintenance and quick drying.
5. **Flannel**
– **Characteristics**: Lightweight, breathable cotton or cotton-blend fabric, often brushed for extra softness.
– **Benefits**: Provides moderate warmth and comfort, making it suitable for a cozy feel without excessive heat.
– **Best For**: Transitional or lightweight slippers, ideal for mild climates or moderate indoor temperatures.
Common Padding Materials
1. **Memory Foam**
– **Characteristics**: Conforms to the shape of the foot, providing custom cushioning and support.
– **Benefits**: Reduces pressure on the foot, improves comfort, and offers shock absorption for enhanced wearability.
– **Best For**: Slippers designed for long periods of wear or those intended for extra comfort.
2. **EVA (Ethylene Vinyl Acetate) Foam**
– **Characteristics**: Lightweight, durable, and shock-absorbent, often used in midsoles for flexible cushioning.
– **Benefits**: Provides support and cushioning while maintaining a lightweight feel, making it ideal for casual use.
– **Best For**: Everyday indoor and light outdoor slippers, balancing comfort with lightweight support.
3. **Polyurethane Foam**
– **Characteristics**: Dense and durable foam that provides long-lasting support and comfort.
– **Benefits**: Offers good resilience and shape retention, making it suitable for slippers that require durable padding.
– **Best For**: High-use slippers, especially those designed for regular indoor or outdoor wear.
4. **Latex Foam**
– **Characteristics**: Naturally springy and breathable, offering good support with a responsive feel.
– **Benefits**: Eco-friendly and resistant to moisture buildup, making it a sustainable option for cushion support.
– **Best For**: Eco-conscious slipper designs, offering natural support without compromising comfort.
5. **Gel Inserts**
– **Characteristics**: Gel-filled pads that provide additional shock absorption and cushioning.
– **Benefits**: Relieves pressure on sensitive areas of the foot, enhancing comfort and reducing impact.
– **Best For**: Slippers aimed at individuals needing extra cushioning, especially for people with foot pain or sensitivity.
2.How to choose the thickness of the lining filler? Is there a standard thickness?
1. **Intended Use and Seasonality**
– **Winter Slippers**: Thicker padding and lining (e.g., fleece, sherpa) for added warmth and insulation.
– **Summer Slippers**: Thinner or lightweight padding (e.g., cotton terry, microfiber) to maintain breathability and comfort without excessive warmth.
– **Result**: Seasonality impacts thickness choice, with thicker materials for warmth and thinner options for breathability.
2. **Comfort and Support Requirements**
– **High-Comfort Slippers**: For slippers intended for prolonged wear, padding thickness of **5-10 mm** (e.g., memory foam) provides optimal cushioning and support.
– **Lightweight Indoor Slippers**: Thin padding of around **3-5 mm** maintains a minimalist feel while providing moderate comfort for casual use.
– **Result**: Thickness is adjusted based on the comfort level desired, with thicker padding in high-support or therapeutic slippers.
3. **Material Type and Density**
– **High-Density Materials**: Materials like memory foam or polyurethane foam have greater support at thinner thicknesses (5-7 mm), as their density provides comfort without excessive bulk.
– **Low-Density Materials**: Materials like cotton batting or EVA foam may require thicker layers (7-10 mm) for equivalent cushioning and durability.
– **Result**: Material density affects thickness choice, with dense materials requiring less thickness for similar comfort levels.
4. **Targeted Consumer Needs**
– **For Foot Sensitivity**: Extra padding (e.g., **8-12 mm** of gel or memory foam) in sensitive areas like the heel or arch provides additional relief for those with foot pain.
– **General Use**: Moderate thickness (4-6 mm) is sufficient for general comfort without adding bulk, ideal for everyday users.
– **Result**: Thickness is customized to meet specific consumer needs, balancing comfort with slipper weight and flexibility.
5. **Standard Thickness Guidelines for Common Materials**
– **Memory Foam**: Generally **5-10 mm**, as this provides adequate cushioning without feeling too heavy.
– **EVA Foam**: Typically **3-7 mm** for lightweight cushioning and flexibility, suitable for casual indoor slippers.
– **Fleece or Sherpa Lining**: Around **2-5 mm** for warmth without excessive bulk, often used in winter slippers.
– **Cotton Terry**: Typically **2-4 mm** for a breathable, moisture-absorbent layer ideal for summer slippers.
– **Gel Inserts**: Approximately **3-5 mm** for targeted cushioning without altering overall slipper thickness.
– **Result**: These thicknesses align with industry standards, balancing comfort, durability, and aesthetic goals.
3.Does the lining filler need to be treated with moisture-proof and antibacterial treatment?
1. **Prevention of Odor and Bacteria Growth**
– **Anti-Bacterial Treatment**: Inhibits the growth of odor-causing bacteria and fungi that thrive in moist environments.
– **Process**:
– Apply anti-microbial agents like silver ions or natural treatments (e.g., bamboo charcoal) directly to the fabric or padding.
– These agents actively prevent bacterial growth, keeping slippers fresh and reducing odor buildup.
– **Result**: Helps maintain hygiene, reduces odor, and extends the freshness of the slippers, especially beneficial for daily wear.
2. **Moisture Control and Quick Drying**
– **Moisture-Wicking Treatment**: Enhances the fabric’s ability to absorb and quickly evaporate moisture, keeping feet dry.
– **Process**:
– Use moisture-wicking technology on lining and padding materials (such as polyester blends treated with hydrophobic agents) to draw moisture away from the skin.
– Some natural materials like bamboo fibers have inherent moisture-wicking properties and may need minimal additional treatment.
– **Result**: Keeps feet dry and comfortable, particularly useful for slippers worn in humid or warm environments.
3. **Mold and Mildew Resistance**
– **Anti-Fungal Treatment**: Prevents mold and mildew buildup, which can occur in damp conditions and degrade materials.
– **Process**:
– Anti-fungal agents are applied to the padding to create a barrier against fungi, often integrated during material processing.
– Materials like latex foam or polyurethane can also be treated with anti-fungal agents to prolong the life of the padding.
– **Result**: Protects slippers from mold damage, enhancing durability and preventing the risk of fungal infections.
4. **Enhanced Durability in High-Humidity Environments**
– **Moisture-Proof Coating**: Provides an additional protective layer, reducing the slipper’s susceptibility to moisture damage.
– **Process**:
– Apply a water-resistant coating to padding and linings, such as Teflon or silicone-based sprays, which create a barrier against moisture without compromising breathability.
– Water-resistant coatings may need to be re-applied periodically depending on use and wear.
– **Result**: Adds longevity to slippers in humid or moisture-prone environments by protecting materials from repeated exposure.
5. **Natural Anti-Microbial Alternatives**
– **Natural Anti-Bacterial Options**: Bamboo charcoal, aloe vera, or tea tree oil are eco-friendly anti-microbial alternatives.
– **Process**:
– Natural anti-microbial treatments are infused directly into fibers or applied as finishes to create a healthy, eco-friendly alternative.
– Materials like bamboo and cork naturally resist bacterial growth and can be paired with organic anti-microbial treatments.
– **Result**: Provides a sustainable, hypoallergenic option for anti-microbial protection without synthetic chemicals.
6. **Industry Standards and Certifications**
– **Oeko-Tex Standard 100**: Certifies that treated materials are free from harmful chemicals and safe for direct skin contact.
– **EPA and REACH Compliance**: Ensures anti-bacterial and moisture treatments comply with health and environmental safety standards.
– **Result**: Quality certifications verify that treatments are safe and effective, making the slippers appealing to health-conscious consumers.
4.How is the padding fixed in the slippers to prevent it from sliding while wearing?
1. **Stitching Layers Together**
– **Method**: The padding is stitched directly to the insole or lining, securing it in place and preventing movement.
– **Process**:
– Use double or zigzag stitching to secure padding evenly across the slipper’s interior.
– Stitches are strategically placed to hold padding edges and central areas.
– **Result**: Stitching provides a strong hold, keeping padding aligned and preventing it from bunching or shifting over time.
2. **Adhesive Bonding**
– **Method**: Adhesive is applied between padding and the insole or lining to create a strong bond, particularly useful for foam or gel inserts.
– **Process**:
– Apply an even layer of adhesive (usually hot-melt or spray adhesive) across the padding and attach it to the insole or lining.
– The adhesive is then cured under light pressure to ensure a firm bond.
– **Result**: Adhesive bonding keeps the padding securely in place, especially effective for lightweight materials like EVA or memory foam.
3. **Quilting or Baffle Stitching**
– **Method**: Quilting involves stitching padding in sections, creating small pockets (baffles) that hold the padding in place.
– **Process**:
– Quilted stitching patterns, often cross-hatch or diamond-shaped, are sewn across the padding to prevent shifting.
– This technique divides padding into smaller sections, limiting movement within each compartment.
– **Result**: Quilting adds stability, reducing padding migration in slippers that require thicker, plush interiors.
4. **Encasing Padding in Fabric Pockets**
– **Method**: Padding is enclosed within a sewn fabric pocket that’s then inserted into the slipper, preventing direct movement.
– **Process**:
– A fabric casing or pocket is created around the padding and securely stitched or glued to the insole or lining.
– The pocket holds padding tightly in place, preventing shifting and providing a smooth feel.
– **Result**: Fabric encasement ensures padding stays in place, maintaining even cushioning without bunching.
5. **Heat Sealing (for Synthetic Padding)**
– **Method**: For certain synthetic paddings, heat sealing bonds the padding to the insole, effectively anchoring it in place.
– **Process**:
– Apply heat to areas where the padding contacts the insole, bonding the materials together.
– Often used with synthetic materials that melt slightly under heat, such as EVA or polyester foams.
– **Result**: Heat sealing provides a durable hold without additional stitching, ideal for padded slippers with synthetic materials.
6. **Layered Structure Design**
– **Method**: Padding is layered between the insole and outsole, where structural layers of the slipper hold it securely in place.
– **Process**:
– Insert padding between the insole and outsole during assembly, securing all layers with stitching or adhesive.
– The layered construction ensures the padding remains anchored by the slipper’s structural components.
– **Result**: Layered structure keeps padding secure without additional stitching, providing a seamless, comfortable feel.
5.Are there special equipment and process standards for cutting fillers??
1. **Die Cutting Machines**
– **Usage**: Die-cutting machines use pre-shaped metal dies to cut padding materials into consistent shapes and sizes.
– **Process**:
– Place padding material under the die, which is then pressed down to cut through layers precisely.
– This is commonly used for high-volume production to ensure uniform padding pieces for each slipper.
– **Benefits**: Fast, precise, and ideal for cutting complex shapes or multiple layers, ensuring consistency in padding dimensions.
– **Best For**: Standard shapes and high-volume production, where consistent sizing and efficiency are priorities.
2. **Laser Cutting Machines**
– **Usage**: Laser cutters are used for intricate cuts and customization, providing high precision without physical blade contact.
– **Process**:
– A laser beam cuts through padding materials by vaporizing or melting them, following pre-programmed design patterns.
– Ideal for synthetic foams, memory foam, and other materials that respond well to heat without fraying.
– **Benefits**: Clean edges and high precision, especially useful for intricate designs or customized padding shapes.
– **Best For**: Customized, complex designs and smaller production runs, as well as materials that benefit from heat-sealed edges.
3. **Band Knife Cutting Machines**
– **Usage**: Band knife machines use a continuous blade loop to cut through padding materials, suitable for thick or layered foams.
– **Process**:
– A band knife machine moves padding along a steady blade, allowing for smooth, straight cuts on large sheets or thick padding.
– **Benefits**: High precision and minimal material waste, allowing for flexible cuts and smooth edges on thicker padding.
– **Best For**: Dense materials like latex foam or polyurethane foam where straight, clean cuts are required.
4. **Rotary Blade Cutters and Guillotine Machines**
– **Usage**: Rotary and guillotine cutters are often used for simpler, straight cuts, particularly in small production batches.
– **Process**:
– Rotary blades or guillotine machines are used to slice padding sheets into desired dimensions quickly and accurately.
– **Benefits**: Economical for small batches, allowing for quick, straight cuts without complex programming or setup.
– **Best For**: Smaller production runs or prototypes, where quick, straight cuts are needed for initial padding samples.
Industry Standards and Process Guidelines
1. **Thickness and Tolerance Standards**
– **Standard Thickness**: Padding materials have standardized thickness ranges (e.g., memory foam at 5-10 mm) depending on intended use and comfort levels.
– **Tolerance Levels**: Thickness tolerance is typically within ±0.5 mm to ensure consistency across batches.
– **Result**: Consistent thickness and tolerance reduce production variability and maintain comfort and performance.
2. **Uniformity and Consistency Checks**
– **Process**: Regular inspections and measurements ensure each padding piece meets design specifications for size, thickness, and shape.
– **Standard**: Industry best practices recommend 100% visual checks or automated measurements on padding dimensions.
– **Result**: Consistent padding dimensions improve quality control and reduce material waste.
3. **Cutting Precision and Edge Quality**
– **Guidelines**: Equipment calibration is maintained to ensure sharp, precise edges without fraying or deformation.
– **Edge Standards**: Materials are cut with smooth, clean edges to prevent uneven wear and ensure a comfortable fit within the slipper lining.
– **Result**: High edge quality improves material longevity and reduces assembly challenges, supporting uniform slipper quality.
4. **Waste Minimization and Material Efficiency**
– **Process**: Materials are laid out and cut using optimized nesting patterns to minimize scrap and reduce waste.
– **Standard**: Many factories follow ISO 9001 or lean manufacturing principles to maximize material efficiency.
– **Result**: Efficient material usage reduces costs and environmental impact, contributing to sustainable production practices.
5. **Health and Safety Compliance**
– **Standard**: Machines are equipped with safety features, and operators are trained on safe handling to prevent accidents.
– **Compliance**: Factories typically follow safety standards like OSHA (Occupational Safety and Health Administration) or local equivalents.
– **Result**: Ensures a safe cutting process that meets regulatory standards, protecting workers and maintaining productivity.
6.How is the stitching process between the filling and the outer fabric? How to ensure smoothness?
1. **Basting Stitch to Hold Layers Temporarily**
– **Method**: A loose basting stitch is used to secure padding and outer fabric together temporarily, ensuring alignment before permanent stitching.
– **Process**:
– Place the padding and outer fabric together and apply basting stitches around the edges to hold them in place.
– Once aligned, the basting stitch can be removed after final stitching.
– **Result**: Helps prevent shifting during sewing, ensuring that both layers remain smooth and well-aligned for permanent stitching.
2. **Topstitching for Edge Stability and Flatness**
– **Method**: A close, even topstitch is sewn around the edges of the padding and fabric layers to keep the fabric flat and prevent bulkiness.
– **Process**:
– Sew along the edges and seams using a straight or zigzag stitch to secure both layers tightly together.
– Topstitching reinforces edges, ensuring smoothness along visible seams.
– **Result**: Provides a neat, flat finish around the edges and helps distribute tension evenly, enhancing the slipper’s appearance.
3. **Quilting or Channel Stitching to Prevent Shifting**
– **Method**: Padding is stitched to the outer fabric in sections or channels, creating compartments that prevent the padding from shifting or bunching.
– **Process**:
– Stitch across the padding in straight or decorative lines (e.g., cross-hatch, diamond patterns) to hold the layers evenly.
– Quilting can be done over the entire surface or in specific high-movement areas.
– **Result**: Secures the padding in place, preventing shifting or unevenness, which helps maintain a smooth, even texture.
4. **Overlocking (Serging) to Secure Raw Edges**
– **Method**: An overlock stitch is applied around the edges of padding and outer fabric layers to bind them together securely.
– **Process**:
– Use a serger or overlock machine to stitch around the edges, trimming and binding the layers as you go.
– This method prevents fraying and creates a clean edge where layers meet.
– **Result**: Ensures edge stability and reduces bulk, preventing the fabric from puckering or curling along the edges.
5. **Double-Layer Stitching for Extra Stability**
– **Method**: Two layers of stitching (e.g., backstitching or double stitching) are used to reinforce high-stress areas like the sole or heel.
– **Process**:
– Sew the padding and fabric together with a straight stitch, then reinforce with a secondary line of stitching near the edges.
– **Result**: Adds durability and prevents separation between layers, especially in areas subject to frequent bending or pressure.
6. **Use of Adhesive Spray Before Stitching**
– **Method**: A light adhesive spray is applied to temporarily bond padding to outer fabric, reducing the risk of shifting during stitching.
– **Process**:
– Apply a thin layer of adhesive spray to the padding, press it against the outer fabric, and let it set briefly before stitching.
– The adhesive holds layers in place without adding bulk or compromising flexibility.
– **Result**: Provides temporary stability, ensuring smoothness and alignment, especially in delicate or complex sections.
Ensuring Smoothness and Flatness in Sewing
1. **Use of Walking Foot on Sewing Machine**
– **Method**: A walking foot attachment helps feed both fabric layers evenly, preventing puckering or gathering.
– **Result**: Keeps layers flat and smooth throughout the stitching process, ideal for thicker padding materials.
2. **Proper Tension Adjustment**
– **Method**: Adjust machine tension settings based on the thickness of padding and fabric to avoid pulling or bunching.
– **Result**: Balanced tension prevents uneven stitching and ensures a smooth, even seam line.
3. **Regular Quality Checks During Sewing**
– **Method**: Pause to check alignment and smoothness after each section, adjusting as needed to maintain consistency.
– **Result**: Ensures that stitching remains flat and smooth across the entire slipper, catching any issues early in the process.
7.How does lining filling ensure wearing comfort?
1. **Selection of Soft, Conforming Padding Materials**
– **Method**: Choose padding materials like memory foam, EVA, or latex foam, which conform to foot shape and evenly distribute pressure.
– **Benefits**: Reduces pressure points and provides a uniform cushioning effect without creating lumps or unevenness.
– **Result**: Creates a soft, supportive base that enhances comfort, ensuring the padding feels natural and integrated.
2. **Even Padding Distribution During Assembly**
– **Method**: Use careful layering techniques to distribute padding evenly across the slipper, especially in high-contact areas.
– **Process**:
– Lay padding evenly across the slipper’s base, heel, and arch, avoiding gaps or overlapping sections that could cause discomfort.
– Utilize basting or adhesive techniques to secure layers and prevent padding movement.
– **Result**: Ensures the padding layer stays consistent across the footbed, eliminating the potential for bumps or pressure points.
3. **Encased Padding in Fabric Pockets**
– **Method**: Enclose padding in fabric pockets or linings, which hold the padding securely and prevent any movement or bunching.
– **Process**:
– The padding is encased within a fabric layer that is stitched or bonded to the inner lining of the slipper.
– This prevents padding from shifting or creating lumps, ensuring a smooth inner surface.
– **Result**: Provides a comfortable, stable interior that remains smooth and eliminates any feeling of detached padding.
4. **Quilting or Channel Stitching for Stability**
– **Method**: Apply quilting or channel stitching to secure padding in place and maintain an even surface.
– **Process**:
– Stitch across the padding and fabric in a grid or channel pattern, preventing padding from moving or piling up.
– This technique keeps padding sections in place, creating a uniform cushioning effect.
– **Result**: Quilting distributes pressure evenly and prevents bunching, maintaining a smooth, even feel.
5. **Bonded Fabric Layers to Prevent Shifting**
– **Method**: Bond padding and lining materials together with adhesive or heat pressing, creating a unified layer that won’t move during wear.
– **Process**:
– Apply adhesive or heat treatment between padding and fabric to create a firm bond, ensuring padding stays in place.
– **Result**: Maintains padding consistency, as the unified layer prevents shifting and keeps the inner surface smooth.
6. **Use of High-Quality, Lightweight Padding**
– **Method**: Select thin, high-quality padding materials that provide cushioning without adding bulk.
– **Benefits**: Lightweight padding minimizes the risk of lumps, providing subtle support and softness without feeling intrusive.
– **Result**: Lightweight padding maintains slipper flexibility and comfort, reducing the sensation of extra material underfoot.
7. **Precision Cutting and Contouring**
– **Method**: Use precise cutting tools and contouring techniques to shape padding according to the slipper’s footbed design.
– **Process**:
– Padding is cut to fit exactly within the slipper shape, avoiding overlaps or gaps that could lead to discomfort.
– Custom contoured padding provides targeted support while maintaining a smooth profile.
– **Result**: Precision-cut padding aligns perfectly with the slipper shape, enhancing comfort and reducing friction.
8. **Final Quality Inspection for Smoothness**
– **Method**: Conduct a final quality check, focusing on the slipper interior to ensure padding and lining feel smooth and even.
– **Process**:
– Inspect the inner lining by hand to detect any irregularities or lumps.
– Make adjustments or refinements if needed before packaging.
– **Result**: Ensures all slippers meet smoothness and comfort standards, guaranteeing a pleasant wearing experience.
8.Is the lining tested after filling to check comfort and durability?
1. **Wear Testing for Comfort and Fit**
– **Objective**: Simulate real-world wear conditions to assess comfort, fit, and initial impression of padding.
– **Process**:
– Testers wear the slippers over a set period (e.g., several hours) and report on aspects like comfort, support, and any pressure points.
– The testing environment may include walking on different surfaces to evaluate the padding’s adaptability and shock absorption.
– **Result**: Provides feedback on the overall comfort level, highlighting any adjustments needed to enhance the fit and cushioning effect.
2. **Compression Testing for Long-Term Durability**
– **Objective**: Measure the ability of the padding to retain its shape and resilience after repeated compression.
– **Process**:
– Padding is compressed under controlled weight or pressure (often simulating body weight) and held for a set time to evaluate deformation.
– The thickness and density of the padding are measured before and after to assess any permanent deformation.
– **Result**: Ensures that the padding maintains its cushioning properties over time without flattening, ensuring lasting comfort.
3. **Flexibility and Bend Testing**
– **Objective**: Test the padding and liner’s ability to withstand bending and flexing without cracking or shifting.
– **Process**:
– The slippers are repeatedly bent or flexed, simulating natural foot movement during wear.
– Observations focus on any material separation, cracking, or bunching that could affect comfort and flexibility.
– **Result**: Confirms the padding’s resilience and ability to adapt to foot movements without causing discomfort or structural issues.
4. **Sweat and Moisture Absorption Testing**
– **Objective**: Assess how well the padding absorbs moisture and maintains comfort without feeling damp or causing odor.
– **Process**:
– A controlled amount of moisture is applied to the padding, mimicking foot perspiration, and left for a specified time.
– The padding is then evaluated for moisture absorption, drying time, and any odor retention.
– **Result**: Ensures the slipper maintains comfort by quickly wicking away moisture and prevents odor buildup, especially in high-humidity conditions.
5. **Abrasion and Wear Testing on Padding and Lining**
– **Objective**: Measure the durability of the padding and lining materials under friction to prevent premature wear.
– **Process**:
– Padding and lining are subjected to controlled abrasion cycles, simulating repeated contact with the foot or other surfaces.
– The materials are checked for signs of wear, such as thinning, pilling, or visible damage.
– **Result**: Confirms that the lining and padding can withstand repeated use without significant degradation, ensuring lasting quality.
6. **Temperature and Climate Testing**
– **Objective**: Test padding and lining comfort in different temperature conditions to evaluate insulation and breathability.
– **Process**:
– Slippers are exposed to both warm and cool environments, and wear tests assess how the padding and lining respond.
– Observations focus on breathability, warmth, and any change in material texture or comfort.
– **Result**: Ensures that slippers maintain comfort and support across varying climates, ideal for indoor and seasonal use.
7. **Antimicrobial and Odor Resistance Testing**
– **Objective**: Assess the effectiveness of anti-bacterial treatments in preventing odor and bacterial growth.
– **Process**:
– Padding is tested for bacterial and fungal growth by simulating sweat exposure over time and analyzing microbial resistance.
– Odor retention is measured post-testing to ensure treatments are effective in keeping the slippers fresh.
– **Result**: Verifies that anti-bacterial treatments maintain hygiene and prevent odors, supporting long-term wearability.
8. **Final Quality Control Inspection**
– **Objective**: Conduct a final inspection to confirm padding placement, smoothness, and overall quality.
– **Process**:
– Each pair is checked for padding alignment, evenness, and consistent thickness.
– Any issues with padding bunching, displacement, or unevenness are corrected before packaging.
– **Result**: Guarantees that the slippers meet quality standards, providing a comfortable, durable, and consistent product to consumers.
9.How to let Cotton Slippers Be More Breathable?
1. **Use Lightweight and Thin Cotton Fabric**
– **Method**: Choose lightweight, thinner cotton fabric to improve airflow and reduce heat retention.
– **Result**: Thinner cotton allows air to circulate more freely, preventing feet from feeling hot and stuffy, especially in warmer climates.
2. **Incorporate Mesh Panels or Ventilation Holes**
– **Method**: Add mesh panels, perforations, or ventilation holes on the upper or sides of the slippers to increase airflow.
– **Result**: Mesh panels allow fresh air in and moisture out, keeping feet cool and reducing sweat buildup.
3. **Open-Toe and Open-Back Designs**
– **Method**: Use open-toe or open-back designs that expose parts of the foot, allowing more air circulation.
– **Result**: Open designs naturally increase breathability, preventing feet from overheating and improving comfort in hot weather.
4. **Choose Moisture-Wicking Linings**
– **Method**: Line the interior of the slipper with moisture-wicking materials such as bamboo fiber or moisture-wicking cotton blends.
– **Result**: These materials draw moisture away from the skin, keeping feet dry and comfortable, reducing dampness that can feel suffocating.
5. **Use Natural, Breathable Insoles**
– **Method**: Choose insoles made from natural, breathable materials like cork or natural latex, which offer breathability and absorb moisture.
– **Result**: Breathable insoles help prevent sweat buildup and improve ventilation within the slipper, enhancing overall comfort.
6. **Reduce Cushioning Layers**
– **Method**: Limit the use of thick cushioning or multiple padding layers, which can trap heat and reduce breathability.
– **Result**: Minimizing padding keeps slippers light and airy, improving airflow and reducing the chance of overheating.
7. **Consider Perforated or Loosely Woven Cotton**
– **Method**: Use perforated or loosely woven cotton fabric that naturally allows air to pass through more easily.
– **Result**: These fabrics increase ventilation by allowing air to penetrate the fabric, keeping feet cool and comfortable.
8. **Add Antimicrobial Treatments to Control Odor**
– **Method**: Apply antimicrobial treatments or use materials with natural antibacterial properties to reduce bacteria and odor buildup.
– **Result**: Controlling odor indirectly supports breathability, as odor-causing bacteria thrive in moist, less breathable environments.
1.What are the difference between embroidery, printing and leather tags on cotton slippers
1. **Embroidery**
– **Aesthetic Effect**:
– Embroidery provides a textured, elegant look with a handcrafted appeal. It adds a premium, customized touch, making slippers feel high-quality and visually appealing.
– **Durability**:
– Embroidery is long-lasting, as the stitched threads are resistant to wear and can withstand washing without fading.
– **Comfort Considerations**:
– Since embroidery adds texture, it is best placed on the outer parts of the slipper to avoid discomfort on areas that come in direct contact with the foot.
– **Best Applications**:
– Ideal for logos, initials, or decorative designs on the upper or side areas of the slipper, providing an upscale, sophisticated appearance.
2. **Printing (Screen Printing, Heat Transfer, Sublimation)**
– **Aesthetic Effect**:
– Printing allows for vibrant colors, intricate designs, and detailed graphics. Heat transfer and sublimation are excellent for high-quality, full-color images or patterns.
– Printing has a smooth, low-profile appearance that integrates well with the fabric, offering versatility in design.
– **Durability**:
– Durability varies by printing method:
– **Screen Printing**: Provides good durability but may fade over time with frequent washing.
– **Heat Transfer**: Has moderate durability but can peel if exposed to high heat.
– **Sublimation**: Fuses directly into synthetic fabrics, making it highly durable but only effective on certain cotton-polyester blends.
– **Comfort Considerations**:
– Printed designs are smooth and won’t affect comfort, even in high-contact areas. However, some printing materials (like thick heat transfers) may feel slightly rigid.
– **Best Applications**:
– Ideal for adding colorful logos, patterns, or graphics on the slipper’s upper and side areas. Sublimation is preferred for blended materials, while screen printing and heat transfer are suited for pure cotton.
3. **Leather or Faux Leather Tags**
– **Aesthetic Effect**:
– Leather tags add a rustic, luxurious look to cotton slippers, providing a natural contrast that complements the fabric’s softness.
– Faux leather tags offer a similar appearance and are suitable for eco-friendly or vegan product lines.
– **Durability**:
– Leather and faux leather are highly durable, with resistance to fraying and fading, providing a lasting branding solution.
– Tags may wear well with time, developing a natural patina that enhances their aesthetic appeal.
– **Comfort Considerations**:
– Tags should be placed on low-contact areas (e.g., slipper sides or outer soles) to avoid any potential stiffness or discomfort against the skin.
– **Best Applications**:
– Suitable for subtle logos or brand names, typically stitched onto the side or back of the slipper. Leather tags add a premium, artisanal look, making them ideal for upscale designs.
2.Can the color and pattern of the logo be customized ?
1. **Color Matching and Customization**
– **Pantone Matching System (PMS)**:
– **Method**: Custom colors can be created using the Pantone Matching System to match a client’s brand colors accurately.
– **Result**: Ensures logo colors are consistent with brand standards across all slippers, maintaining brand integrity.
– **Digital Color Matching (for Printing)**:
– **Method**: For printed logos, digital printers allow precise color matching through RGB or CMYK values.
– **Result**: Achieves vibrant, consistent colors for detailed logo designs or gradient effects, especially useful in screen printing or sublimation.
– **Thread Color Matching (for Embroidery)**:
– **Method**: Embroidery threads come in various colors, and custom thread shades can be selected to match brand colors closely.
– **Result**: Provides accurate brand representation, with high durability for embroidery on cotton.
– **Leather/Faux Leather Tag Customization**:
– **Method**: Leather tags can be customized in various shades, from natural brown tones to dyed colors that match brand aesthetics.
– **Result**: Offers a premium, rustic look that aligns with brand colors, though colors are often more muted compared to prints.
2. **Design Flexibility for Logos**
– **Detailed Graphics for Printed Logos**:
– **Method**: Screen printing, heat transfer, and sublimation allow for intricate designs, logos, and even full-color graphics with gradients or shading.
– **Result**: Provides the flexibility to replicate complex logos and maintain design elements accurately, suitable for all slipper styles.
– **Embroidery for Classic Logos and Simple Designs**:
– **Method**: Embroidery offers high-quality stitching for logos that emphasize simplicity, text, or bold shapes.
– **Result**: Adds a textured, premium touch to the logo, ideal for brands aiming for a sophisticated or artisanal look on slippers.
– **Custom Shapes and Sizes for Leather/Faux Leather Tags**:
– **Method**: Leather tags can be cut into custom shapes and sizes, allowing unique placements like side or heel areas.
– **Result**: Adds a unique, artisanal feel that aligns with upscale brand aesthetics, with customization options for debossed or embossed designs.
3. **Incorporating Brand Style Elements**
– **Typography and Font Styles**:
– **Method**: Custom typography, fonts, and layout options can be used to match a brand’s identity directly on the logo or text labels.
– **Result**: Reinforces brand style, ensuring that font choices are aligned with the client’s overall aesthetic.
– **Adding Patterns or Background Elements**:
– **Method**: Background elements, patterns, or textures that align with brand themes can be added, particularly with digital printing techniques.
– **Result**: Creates a cohesive design that enhances brand visibility and makes the slippers visually engaging.
– **Seasonal and Limited-Edition Customizations**:
– **Method**: Design flexibility allows for seasonal or limited-edition styles that reflect specific themes or brand campaigns.
– **Result**: Enables brands to refresh slipper designs in line with seasonal colors or event themes, appealing to a wider audience.
3.Which font effects are suitable for presentation on cotton slippers?
### 1. **Simple and Bold Sans-Serif Fonts**
– **Examples**: Helvetica, Arial, Proxima Nova, Futura
– **Advantages**:
– Clean and easy to read at small sizes, making them ideal for logos or brand names on slippers.
– Simple sans-serif fonts have a modern appeal that suits a wide range of brands, from minimalist to casual styles.
– **Best Application**:
– Ideal for embroidery, screen printing, or leather tags where legibility is key. Sans-serif fonts look clean and professional without overwhelming the design.
– **Effect**: Adds a contemporary, streamlined look that aligns with brands looking for simplicity and clarity.
### 2. **Rounded and Soft Fonts**
– **Examples**: Avenir Rounded, Gotham Rounded, Poppins
– **Advantages**:
– Rounded fonts have a softer, more approachable look, complementing the cozy and comfortable feel of slippers.
– They maintain legibility while adding a friendly, inviting touch to the design.
– **Best Application**:
– Works well for embroidered logos or screen prints, especially for brands targeting casual, family-friendly, or lifestyle markets.
– **Effect**: Creates a warm, inviting feel, emphasizing the slippers’ comfort and relaxed nature.
### 3. **Handwritten and Script Fonts**
– **Examples**: Pacifico, Lobster, Brush Script, Sacramento
– **Advantages**:
– Handwritten and script fonts convey a handcrafted or artisanal look, making them ideal for brands with a rustic, personal, or eco-friendly image.
– Adds a unique and personalized touch, creating a stylish or boutique feel on the slippers.
– **Best Application**:
– Suitable for smaller logos, brand names, or accent phrases on the slipper’s upper or side. Works best with screen printing or embossed leather tags for high-quality detail.
– **Effect**: Gives a customized, personal look that appeals to artisanal or boutique brands, aligning with a handmade aesthetic.
### 4. **Vintage Serif Fonts**
– **Examples**: Georgia, Times New Roman, Baskerville, Playfair Display
– **Advantages**:
– Serif fonts have a classic, timeless appeal and add a touch of elegance to the design.
– They are particularly suited for premium or heritage brands, offering a traditional look that suggests quality.
– **Best Application**:
– Best for leather tags or embossed designs, where the serifs can add texture without compromising legibility.
– Serif fonts with clean, bold lines work well in embroidery if the letter size is large enough for clarity.
– **Effect**: Creates a refined, premium look, ideal for brands targeting a sophisticated audience.
### 5. **Geometric and Block Fonts**
– **Examples**: Bebas Neue, Montserrat, Oswald
– **Advantages**:
– Geometric and block fonts have a strong, bold look that creates visual impact and is easy to read from a distance.
– Ideal for brands looking to make a bold statement, offering high visibility and a modern edge.
– **Best Application**:
– Works well with embroidery, screen printing, or leather tags on slipper designs that aim for high contrast and visibility.
– **Effect**: Provides a bold, attention-grabbing appearance, perfect for brand names or logos that want to stand out.
### 6. **Minimalistic Monospaced Fonts**
– **Examples**: Courier, Space Mono, IBM Plex Mono
– **Advantages**:
– Monospaced fonts provide a balanced, uniform look that aligns well with minimalist, tech, or modern aesthetics.
– They offer a unique style without being overly decorative, suitable for brands focused on simplicity.
– **Best Application**:
– Ideal for screen printing or smaller leather tags, where a modern, clean appearance is desired.
– **Effect**: Offers a unique, understated aesthetic that aligns with minimalist or tech-inspired brands, emphasizing balance and symmetry.
4.What are the main steps in the customized production of cotton slippers?
### 1. **Design Consultation and Specification Development**
– **Objective**: Understand the client’s needs, including style, color, logo, and material preferences.
– **Process**:
– Initial consultation to discuss brand identity, target audience, and specific design elements like colors, logos, and patterns.
– Develop detailed specifications, including fabric choices (e.g., cotton type, padding thickness) and logo placements.
– **Result**: A comprehensive design brief that serves as a blueprint for the custom production process.
### 2. **Material Selection and Sourcing**
– **Objective**: Source materials that match the client’s specifications in terms of comfort, durability, and aesthetics.
– **Process**:
– Select specific cotton fabric types, linings, padding materials, and any decorative elements such as embroidery thread or printing ink.
– Ensure materials meet quality and environmental standards (e.g., GOTS-certified organic cotton, hypoallergenic padding).
– **Result**: High-quality materials that align with the client’s standards and the slipper’s intended use.
### 3. **Prototyping and Sample Creation**
– **Objective**: Create a physical prototype of the custom slipper design to confirm fit, comfort, and aesthetic appeal.
– **Process**:
– Produce a sample based on the design brief, including all custom elements such as logos, color choices, and embellishments.
– Conduct a review with the client to gather feedback and make necessary adjustments.
– **Result**: An approved sample that represents the final product, ready for full-scale production.
### 4. **Cutting and Preparation of Materials**
– **Objective**: Prepare all components of the slipper, including cutting fabric, padding, and lining to the exact specifications.
– **Process**:
– Use specialized equipment like die cutters or laser cutters to achieve precise shapes and consistent sizing.
– Prepare logo and branding elements (e.g., embroidery, printing, leather tags) for attachment to the slipper.
– **Result**: All parts of the slipper are prepped, ensuring consistency and readiness for assembly.
### 5. **Assembly and Stitching**
– **Objective**: Assemble the slipper components, focusing on securing padding, stitching fabric, and ensuring structural stability.
– **Process**:
– Stitch together the insole, upper, and sole, ensuring alignment and smooth seams.
– Attach logo elements using embroidery, printing, or tags as specified in the design brief.
– **Result**: The base structure of the slipper is complete, with all custom elements secured and aligned.
### 6. **Quality Control and Testing**
– **Objective**: Verify that each slipper meets quality standards for comfort, durability, and appearance.
– **Process**:
– Inspect each slipper for consistent sizing, secure stitching, and even padding distribution.
– Conduct wear and durability tests to ensure padding comfort, moisture-wicking performance, and logo durability.
– **Result**: Only slippers that pass quality control are approved for packaging, ensuring a high-quality product for the client.
### 7. **Packaging and Branding**
– **Objective**: Package slippers in customized packaging that reflects the brand, ensuring a cohesive presentation.
– **Process**:
– Use branded boxes, tissue paper, or bags with logos or brand colors, if requested by the client.
– Final inspection to ensure that each package contains a pair of slippers in pristine condition.
– **Result**: Branded packaging that reinforces the client’s image, adding value and appeal to the final product.
### 8. **Shipping and Delivery**
– **Objective**: Arrange for timely delivery to the client, ensuring that products arrive on schedule and in perfect condition.
– **Process**:
– Coordinate with shipping partners and arrange logistics for efficient, safe delivery.
– Provide tracking information and delivery confirmations to the client for smooth coordination.
– **Result**: The client receives their custom slippers, ready for retail or distribution.
5.How to ensure that the design confirmed by the customer is consistent with the final product
### 1. **Detailed Design Specifications and Documentation**
– **Objective**: Create precise, detailed design documentation that outlines all elements, dimensions, colors, and materials.
– **Process**:
– Develop a design specification document with exact Pantone color codes, fabric samples, thread types, logo placements, and dimensions.
– Include detailed illustrations or CAD drawings, and confirm each aspect with the client.
– **Result**: A comprehensive design reference that guides production, reducing the risk of discrepancies.
### 2. **Sample Production and Client Approval**
– **Objective**: Create an exact sample of the product for client approval before starting mass production.
– **Process**:
– Produce a sample that includes all design elements, such as stitching, logo placement, padding, and color choices.
– Share the sample with the client for feedback, making any necessary adjustments and obtaining final approval.
– **Result**: An approved prototype that serves as a model for production, ensuring the client’s expectations are clearly defined.
### 3. **Color Matching and Material Verification**
– **Objective**: Ensure accurate color and material consistency by verifying components with the client’s design specifications.
– **Process**:
– Use Pantone color matching for fabric and thread, and confirm all material selections (e.g., cotton type, padding density) against the original specifications.
– Perform a side-by-side comparison of each batch of materials with the approved sample to maintain consistency.
– **Result**: Accurate colors and materials that match the client’s design, minimizing the risk of visual inconsistencies.
### 4. **Digital Mockups and 3D Rendering**
– **Objective**: Provide a digital visualization of the design before physical production to align expectations.
– **Process**:
– Use 3D rendering software to create a realistic model of the design, allowing the client to visualize it from different angles.
– Confirm details like logo size, position, and color schemes in the digital model before moving to production.
– **Result**: Allows clients to approve design details digitally, ensuring they understand the final look.
### 5. **Quality Control During Production**
– **Objective**: Implement quality checks at each stage of production to ensure adherence to design specifications.
– **Process**:
– Inspect each step (e.g., fabric cutting, stitching, padding assembly) for compliance with the design brief.
– Perform random checks on logo placement, stitching quality, and color consistency to ensure accuracy throughout production.
– **Result**: Consistent quality control maintains fidelity to the approved design, ensuring the final product meets client expectations.
### 6. **Final Inspection Before Packaging**
– **Objective**: Conduct a final review of each product before packaging to confirm that it matches the approved sample.
– **Process**:
– Inspect each pair for accurate stitching, padding evenness, color consistency, and logo placement.
– Compare finished items against the approved sample to verify alignment with the client’s requirements.
– **Result**: Ensures that only products that meet the design specifications are packaged and shipped to the client.
### 7. **Post-Production Approval and Client Verification**
– **Objective**: Provide the client with samples or images of the final product batch for confirmation.
– **Process**:
– Send photos or a batch sample of the finished slippers to the client for a last round of approval before shipping.
– Confirm that all expectations are met and address any final adjustments if needed.
– **Result**: The client has a final chance to verify consistency, providing peace of mind that the final product matches the approved design.
6.How to shorten the procurement and preparation time of customized materials during production
### 1. **Establish Relationships with Reliable Suppliers**
– **Objective**: Work with trusted suppliers who understand the project’s requirements and can quickly fulfill custom orders.
– **Process**:
– Build long-term partnerships with suppliers specializing in relevant materials, ensuring familiarity with quality standards and quick response times.
– Negotiate prioritized processing or “rush” options with suppliers for high-demand orders.
– **Result**: Reliable suppliers with strong relationships often offer faster turnaround times and prioritize loyal clients, reducing procurement delays.
### 2. **Use Pre-Selected or Stock Materials**
– **Objective**: Choose from a catalog of pre-approved materials that meet design requirements, rather than sourcing entirely new materials.
– **Process**:
– Work with suppliers to identify stock materials that closely match the client’s specifications and keep them ready for quick access.
– Maintain a small inventory of frequently used materials (e.g., common cotton blends, padding types) to expedite initial production stages.
– **Result**: Minimizes lead times by using readily available materials, ensuring quicker transitions from design approval to material preparation.
### 3. **Implement Forecasting and Advanced Planning**
– **Objective**: Anticipate material needs and start sourcing custom materials early in the process.
– **Process**:
– Based on historical demand or client trends, pre-order certain materials or high-demand custom colors and logo elements.
– Use demand forecasting tools to identify potential high-demand items, preemptively ordering to reduce waiting times.
– **Result**: Ensures materials are ready when needed, allowing for immediate production starts upon client approval.
### 4. **Optimize Material Specifications for Versatility**
– **Objective**: Choose materials and colors that can be adapted across multiple designs to streamline sourcing.
– **Process**:
– Select versatile colors and materials that align with common brand requests or trends, enabling their use across multiple custom orders.
– For example, using universal colors (e.g., black, white, neutral tones) or standard padding materials reduces the need for custom processing.
– **Result**: Allows for pre-purchased materials to fit various custom orders, shortening lead times for frequently requested designs.
### 5. **Leverage Local Suppliers for Faster Delivery**
– **Objective**: Work with local or regional suppliers to minimize shipping and customs delays.
– **Process**:
– Source materials from suppliers within closer proximity, especially for materials with short lead times like fabric, padding, or labels.
– Negotiate frequent, scheduled deliveries with local suppliers for high-usage materials, maintaining consistency in the supply chain.
– **Result**: Reduces transportation time and potential delays, especially useful for projects requiring quick turnaround.
### 6. **Implement Just-in-Time (JIT) Inventory Management**
– **Objective**: Use JIT inventory practices to maintain lean stock levels and procure materials only when needed.
– **Process**:
– Coordinate closely with suppliers to order materials on demand, aligning orders with actual production schedules to avoid overstock.
– Maintain regular communication with suppliers to ensure they can quickly fulfill JIT orders for custom or high-demand items.
– **Result**: Reduces the need for excess storage and enables quick material preparation, especially useful for small-batch or frequently changing designs.
### 7. **Utilize Technology for Real-Time Tracking and Communication**
– **Objective**: Streamline communication and monitor material availability through real-time tracking software.
– **Process**:
– Use ERP (Enterprise Resource Planning) or SCM (Supply Chain Management) software to track material availability, lead times, and production timelines.
– Set up automated notifications with suppliers, keeping stakeholders informed of inventory levels, shipping updates, and potential delays.
– **Result**: Reduces delays by allowing proactive adjustments based on real-time data, enhancing collaboration and reducing unexpected waiting periods.
### 8. **Pre-Approve Substitute Materials with Clients**
– **Objective**: Identify and get approval for substitute materials that can be used in case of delays or availability issues with custom materials.
– **Process**:
– Present substitute options to the client during the design stage, so alternative materials are pre-approved for quicker decision-making.
– Keep a catalog of readily available substitute materials that match quality standards and closely align with the custom requirements.
– **Result**: Enables flexibility, allowing production to proceed with substitute materials if the preferred options are delayed.
7.What are the requirements for machines in customized production?
### 1. **Flexibility and Multi-Functionality**
– **Objective**: Use machines that can handle diverse processes to accommodate unique customizations.
– **Requirements**:
– **Multi-functional sewing machines** capable of handling different stitch types (e.g., straight, zigzag, overlock) for varied designs.
– **Embroidery machines** with programmable designs to incorporate custom logos, initials, and patterns.
– **Die-cutting or laser-cutting machines** that can cut different shapes and sizes based on specific design requirements.
– **Result**: Flexible machines allow for quick adjustments and are ideal for producing a range of custom designs without needing major reconfiguration.
### 2. **Precision and Accuracy**
– **Objective**: Ensure machines can produce precise, accurate cuts, stitches, and placements to meet specific client designs.
– **Requirements**:
– **Computer-Aided Design (CAD) Integration** for cutting and stitching machines, enabling exact replication of client-approved designs.
– **High-precision laser cutters** for detailed patterns and accurate material sizing, especially for complex designs or intricate logo placements.
– **Automatic tension adjustment** in sewing machines to maintain consistent stitch quality across different fabric types and thicknesses.
– **Result**: Precision-focused equipment ensures that custom designs are executed accurately, maintaining quality and alignment with client specifications.
### 3. **Quick Setup and Adjustability**
– **Objective**: Minimize setup and adjustment time to switch between different custom orders efficiently.
– **Requirements**:
– **Quick-change tools and attachments** for sewing and cutting machines to allow fast changes in thread, needle, and die configurations.
– **Adjustable feed systems** that adapt to different material types (e.g., thick padding, lightweight cotton) without extensive reconfiguration.
– **Modular embroidery machines** that can easily switch between designs and thread colors for quick order adjustments.
– **Result**: Machines with quick setup capabilities improve efficiency and reduce downtime between custom orders.
### 4. **Digital Integration for Design Customization**
– **Objective**: Use machines with digital interfaces to streamline custom design implementation and replication.
– **Requirements**:
– **Programmable embroidery machines** that allow uploading of digital logo files directly, minimizing manual setup.
– **Digital printing and color-matching systems** to accurately replicate brand colors and complex patterns.
– **3D modeling and rendering compatibility** for machines to visualize designs before production, reducing errors.
– **Result**: Digital integration allows for faster adaptation to custom specifications and greater design flexibility.
### 5. **High-Speed Efficiency for Small-Batch Production**
– **Objective**: Equip machines that maintain production speed while handling unique customizations for small batches.
– **Requirements**:
– **High-speed sewing and cutting machines** capable of handling frequent changes in materials and patterns without sacrificing productivity.
– **Efficient embroidery machines** with multiple heads to handle intricate designs quickly, ideal for producing several pairs simultaneously.
– **Automatic material feeders** and stackers to minimize handling time, increasing throughput in small-batch custom production.
– **Result**: High-speed equipment ensures that custom production meets deadlines without compromising on quality.
### 6. **Consistent Quality Control Features**
– **Objective**: Use machines with built-in quality control to detect and correct errors during production.
– **Requirements**:
– **Stitch monitoring sensors** in sewing machines to detect thread breaks or skipped stitches in real-time.
– **Automatic tension and alignment adjustments** for consistent stitch quality and placement, especially critical in custom designs.
– **Material alignment detectors** on cutting machines to ensure fabric and padding are cut according to exact specifications.
– **Result**: Integrated quality control features reduce the need for post-production adjustments and ensure high standards for each custom item.
### 7. **Energy Efficiency for Cost-Effective Production**
– **Objective**: Use energy-efficient machines that reduce operational costs, especially important in small-scale custom production.
– **Requirements**:
– **Low-energy consumption sewing and embroidery machines** to optimize energy use without sacrificing performance.
– **Automatic power-off or standby features** for machines during idle times, reducing overall energy use.
– **Inverter technology** in high-power equipment like laser cutters to optimize energy use based on workload.
– **Result**: Energy-efficient machines support cost-effective production, essential for maintaining profitability in custom orders.